System Setup
In this tutorial, we will set up our computer environment for JavaScript development. This involves getting a GitHub account and installing certain tools (i.e.: computer programs).
Along the way, we will configure our primary tool - Visual Studio Code - with the recommended extensions for this course. Most of these tools are command-line tools, meaning that you typically run them from the terminal environment (see [To-Be-Written] for details). In this tutorial, I’ll be using the terms ‘tool’ and ‘program’ interchagably, as they mean basically the same thing in this context.
Sign Up for GitHub
Section titled “ Sign Up for GitHub”
You can get a GitHub account for free. GitHub is a hosting platform for the git version control system. I’ve been using GitHub since 2012, and my life has been happier, simpler and more productive ever since!
Installing the tools
Section titled “Installing the tools”The two key tools are Visual Studio Code (VS Code) and git. All the other tools are important, but you will be using these two the most. I’ve put these installation instructions in order of what tools should probably be installed first. Don’t panic if you’ve installed them in a slightly different order; it should work out in the end.
Also note that the following instructions are geared mostly for Windows 11. They will generally work on Windows 10 and Mac, but you should be prepared to adjust some steps accordingly.
Visual Studio Code
Section titled “Visual Studio Code”We use VS Code primarily as an editor to write our source code, but it’s much more than just a code editor. It’s an extensible IDE (Integrated Development Environment), with several common support features built in. Here’s how to get it installed.
-
Go to the Visual Studio Code Website and click the Download button for your operating system.
-
Run the installation file. You will be presented with a number of prompts with default settings and options.
-
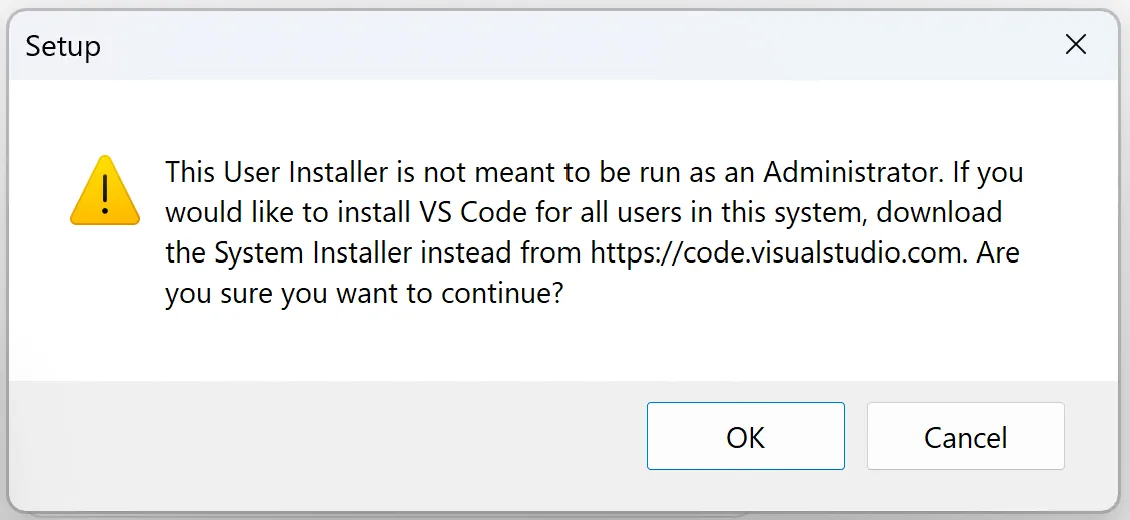
If you get an alert warning about the “User Installer”, simply click the OK button.
-
You can accept all the default settings. There is, however, one setting I often prefer to turn on. I like to turn on both of the
Add "Open with Code"actions.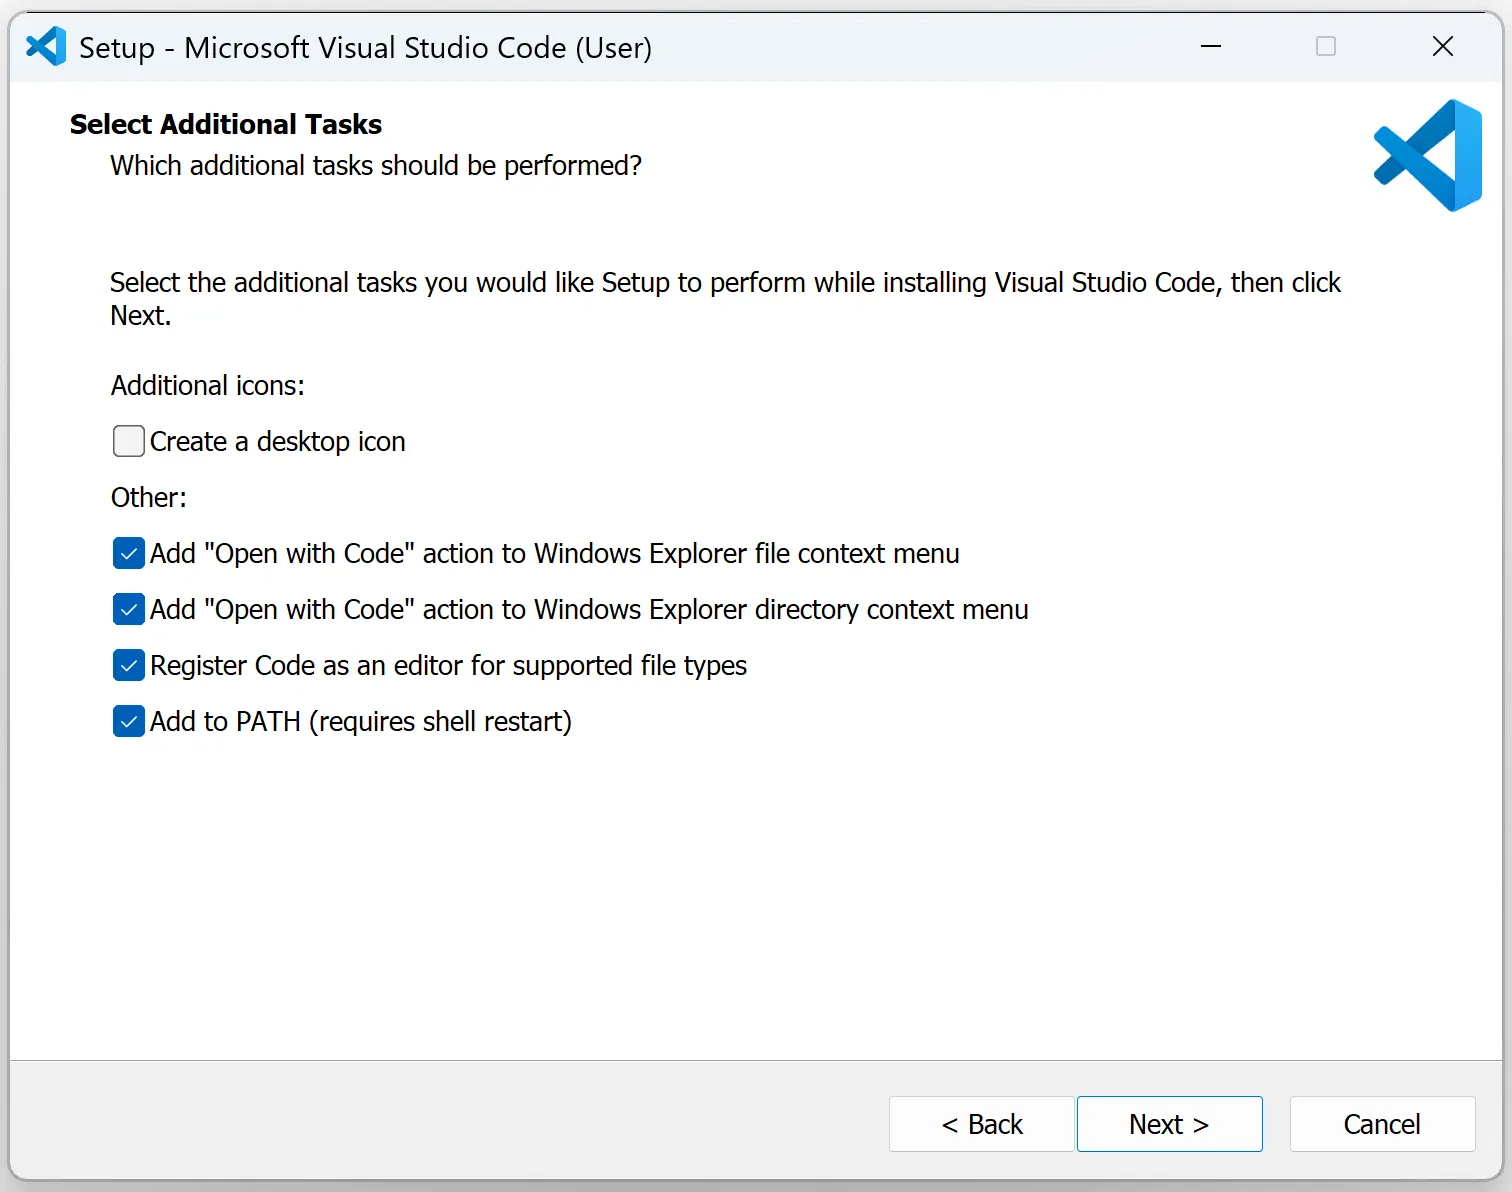
-
Once installation is complete, you are given an option to open VS Code for the first time. Feel free to check it out and look around. :)
Git for Windows/Mac
Section titled “Git for Windows/Mac”git is the version control software that the vast majority of programmers use every day. While there are several GUI tools built around it, git itself is a tool that you run from the terminal. Follow the steps below to install on your computer.
-
Go to the git download page and click the link for your operating system (e.g.: Windows).
-
Follow the instructions for your operating system.
-
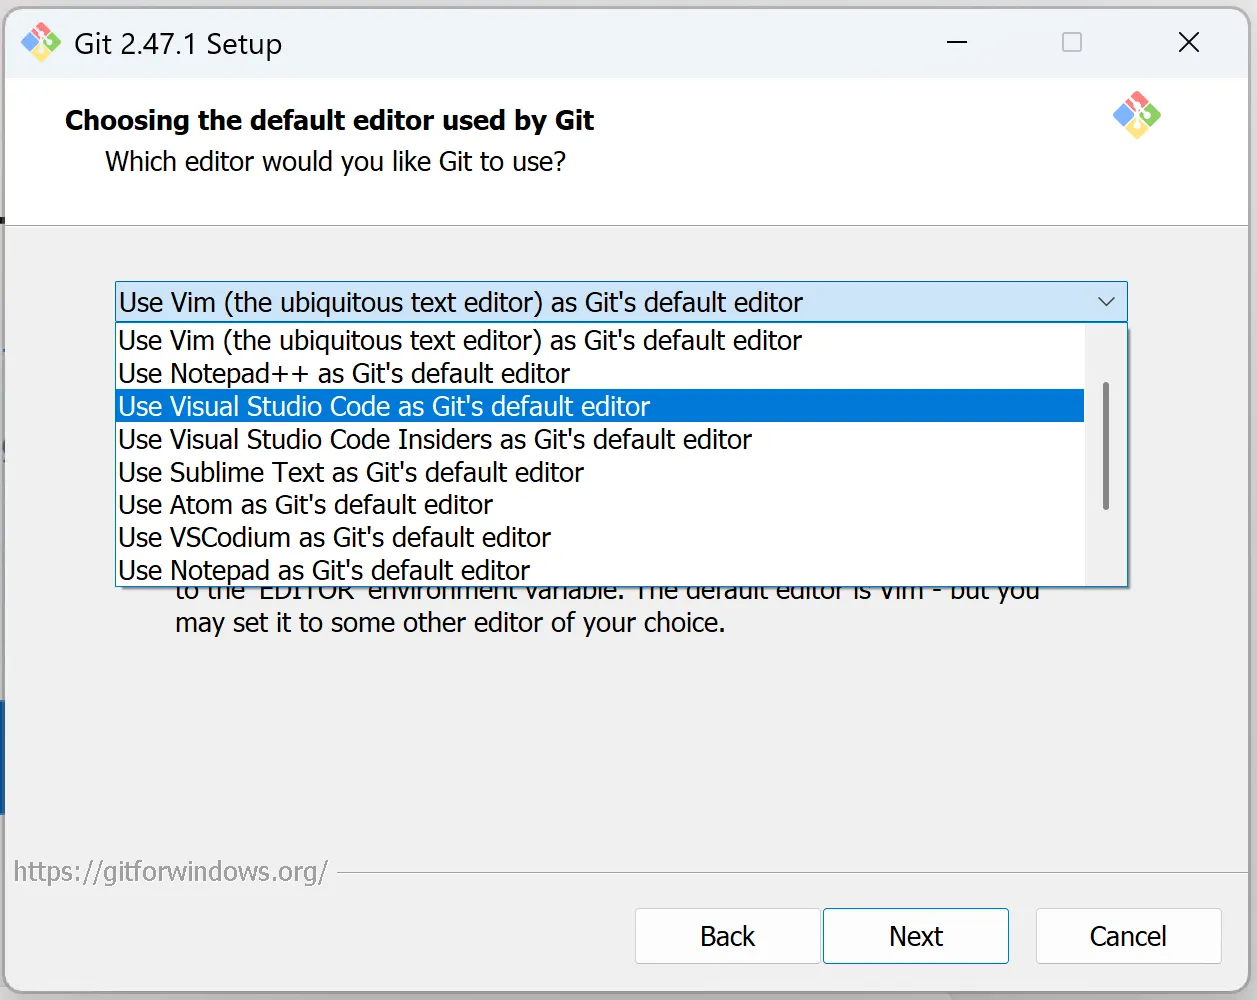
(Windows) Run the installation file and follow the prompts. You can accept all the default settings. For advanced usage, however, you may want to have git use Visual Studio Code as the default editor. You can turn that on, if you wish, or leave it with the default setting.
-
Our next step is to tell git what user name and email to use when performing commits. Start by opening a terminal window (press the Windows key and type
terminal). -
Type
git --versionto ensure that git is installed and available. If it’s not, take a look at the tip in the previous step. -
Type
git config --global user.name "Your Name"to set your name for git (e.g.:"Stewart Dent"). -
Type
git config --global user.email "Your Email"to set your email for git (e.g.:"stewdent@gmail.com") -
Type
git config user.nameto view the name that you set. -
Type
git config user.emailto view the email that you set.
Node is a run-time environment that allows you to run JavaScript outside of the browser. As JavaScript developers, we’ll use Node primarily as the way we set up our [JavaScript Projects][TODO: Link to future article].
When you install Node, you actually get two command-line programs on your computer: node and npm. You can learn more about that in [TODO: Link to future article].
-
Go to the NodeJS Website and click the download button for the LTS version.
-
Run the installation file and follow the prompts. You can accept all the default settings.
-
Check that the
nodeandnpmprograms are accessible. Close any terminal windows you have open, and then open a new termial window (this refreshes the terminal’s memory of what programs have been installed). -
In the terminal window, type the following
Terminal window node --versionnpm --version -
If you get an error about the
npmnot being an “executable script”, it’s likely a security/policy issue. You can resolve that by entering the following:Terminal window Set-ExecutionPolicy -ExecutionPolicy RemoteSigned -Scope CurrentUserThis command will tell your computer to trust remotely-signed applications (like
npm) for the current user. For more information, see this article. -
Double-check that you can now access/use
npmby checking the installed version.Terminal window npm --versionYou should see information on the installed version of
npm.
PNPM is a modern alternative to using the npm tool. I strongly prefer using pnpm over npm because it’s very fast and efficient!
-
Remember how I said it didn’t matter too much about the order of installing these tools? Well, this is an exception. If you haven’t installed Node yet, go back to those steps and complete the process before you continue installing pnpm.
-
Go to the pnpm installation page.
-
Follow the instructions for your operating system. On Windows, you can run the following from a terminal window.
Terminal window npm install -g pnpmThis will install pnpm as a global npm package, meaning you can use
pnpmdirectly from your terminal.
GitHub CLI
Section titled “GitHub CLI”The GitHub CLI is a tool that brings some GitHub-specific goodness to working with git. I find it helps me immensely with administrative tasks (creating issues, viewing workflows, etc.), but probably the most frequent way I use it is to quickly open up the GitHub site for my local repository by typing gh browse in the terminal.
- Go to the GitHub CLI site and click the download button.
- Run the installation file and follow the prompts. You can accept all the default settings.
- Once again, we need to do a bit of authorization setup, but this time we will use the terminal that’s built into Visual Studio Code.
- If Visual Studio Code is open, close it and restart (for pretty much the same reasons mentioned for the Windows terminal when we installed git).
- Press Ctrl + ` (the backtick key near the top left of your keyboard). This key combination is used to open and close (toggle) the terminal window in VS Code.
- Type
gh --versionto ensure that the GitHub CLI is installed and available. - Ensure that you are logged into GitHub.com in your default browser. Then, in the terminal, type
gh auth loginto authenticate the GitHub CLI. Authentication is a one-time step.- Follow the prompts to authenticate.
- You can use the
gh auth statuscommand to view your authentication status when you are done following the prompts.
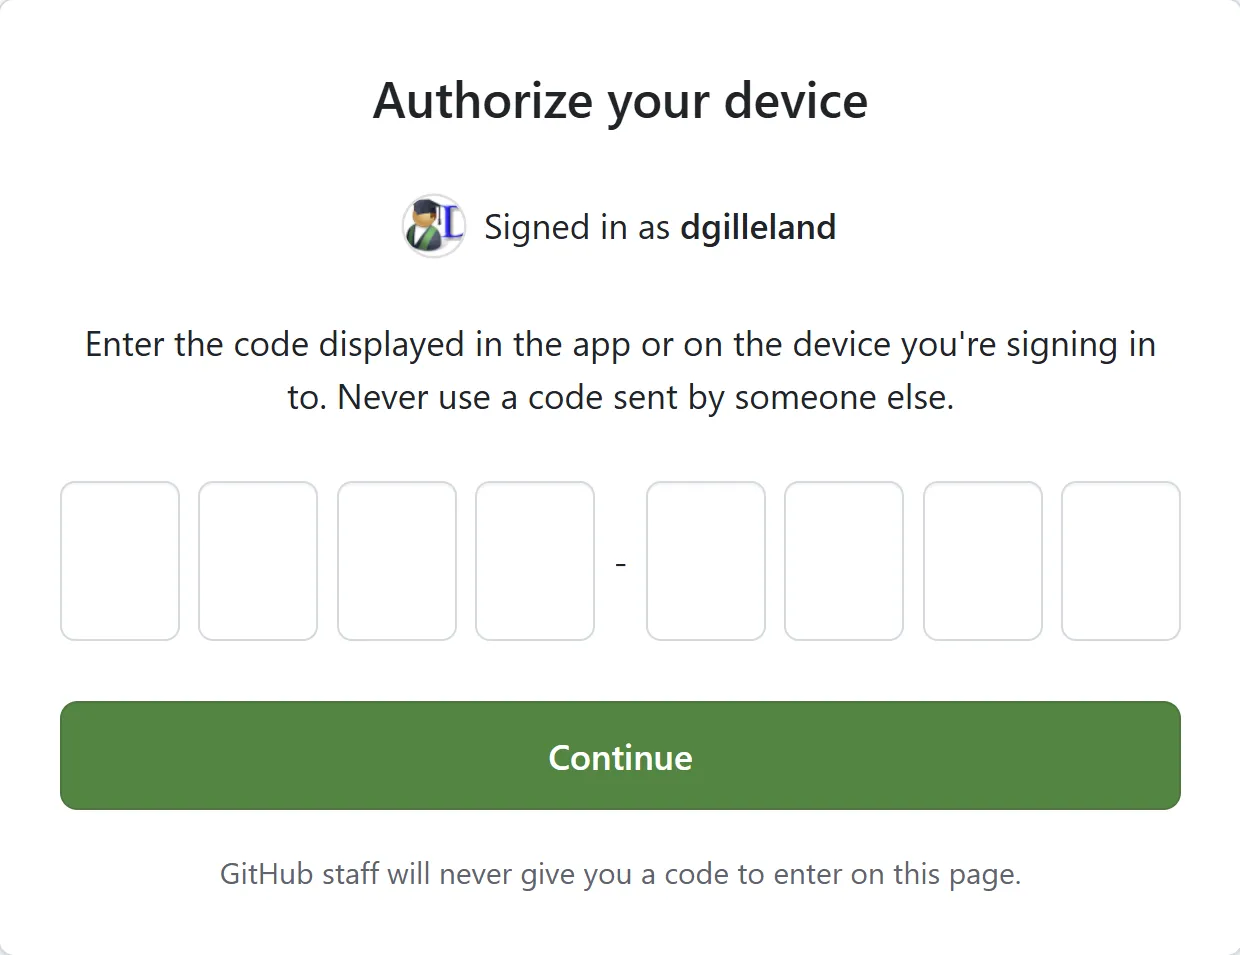
The prompts and appropriate responses when running gh auth login will look something like the following:
gh auth login? Where do you use GitHub? GitHub.com? What is your preferred protocol for Git operations on this host? HTTPS? Authenticate Git with your GitHub credentials? Yes? How would you like to authenticate GitHub CLI? Login with a web browser
! First copy your one-time code: BFAB-E2D0Press Enter to open https://github.com/login/device in your browser...✓ Authentication complete.- gh config set -h github.com git_protocol https✓ Configured git protocol✓ Logged in as stew-dent
VS Code and GitHub Authorization
Section titled “VS Code and GitHub Authorization”Visual Studio Code integrates with git and GitHub, but you need to sign into GitHub from within Visual Studio Code. There are various ways to do this, but the steps below work fairly well.
-
Make sure you are signed into GitHub in your web browser. Visual Studio Code will be using the browser to help complete the authentication between it and GitHub.
-
Launch Visual Studio Code.
-
Click on the source code tab from the sidebar (or press Ctrl + shift + g).

-
Click the
Clone Repositorybutton. A dialog will appear at the top of VS Code. -
Click
Clone from GitHub, and that will start the process of Visual Studio’s interaction with your browser to complete the authentication process. -
Be sure to follow the remaining prompts as VS Code and your browser interact. Don’t rush the process, or you might miss one of the confirmation dialogs that pops up.
-
Once you’re authenticated and control is given back to VS Code, the cloning window will be waiting for you to choose which repository to clone. Simply press Esc.
VS Code Extensions
Section titled “VS Code Extensions”Extensions are a great way to improve your productivity and simplify your coding experience. Here are the recommended extensions for this course:
- Markdown All in One (by Yu Zhang)
- Markdown PDF (by yzane)
- Markdown Preview Mermaid Support (by Matt Bierner)
- Launch VS Code and click the Extensions icon.
- Enter the name of the extension you want in the search bar.
- Click the Install button for the extension.
Troubleshooting
Section titled “Troubleshooting”Unknown Program
Section titled “Unknown Program”Depending on the security setup on your computer, you might right into a problem when you check the version of the command-line tool(s) you’ve just installed. For example, when running npm --version, you might see the following.
File … cannot be loaded because running scripts is disabled on this system…
Or, if you have installed pnpm from some method other than the one listed in step 3 above, you might get an error like this.
pnpm : The term ‘pnpm’ is not recognized as the name of a cmdlet, function, script file, or operable program…
You might have this problem for other command-line tools as well, so these steps should work for all of the tools installed in this tutorial. If this is happening for you, here’s how you fix it (and if you don’t have this problem, then skip this section).
-
Entering the following in the terminal window.
Terminal window Set-ExecutionPolicy -ExecutionPolicy RemoteSigned -Scope CurrentUserThis command will tell your computer to trust remotely-signed applications (like
npm) for the current user. For more information, see this article. -
Double-check that you can now access/use your command-line tool by checking the installed version. For example, to check
npm, type:Terminal window npm --version`You should see information on the installed version of
npm.
Stuck in the VIM/VI Editor?
Section titled “Stuck in the VIM/VI Editor?”If you do a git pull and find yourself in the vim or vi editor (the default), you might wonder how to exit out of the editor. Try pressing EscZZ (note that these are the capital letters ‘Z’). If that doesn’t work, then just click the trash can icon (if you’re in the VS Code terminal) or just close the external terminal window to abort the command.
Why does this happen? Two reasons.
First, your git pull is pulling in commits that fit “before” any local commits you have in your repository, and git wants you to enter a message for the merge it’s trying to perform. (git pull is the equivalent of a git fetch followed by a git merge.)
Secondly, the real reason you’re in Vim or Vi is because you didn’t choose “VS Code as Git’s default editor” when you installed the software above. No worries, though. You can reset git to use VS Code as the editor by running the following command in the terminal.
git config --global core.editor "code --wait"The next time you do a git pull, any merging messages will open in the VS Code editor and git will wait for you to enter your message and close that tab in your editor before completing the merge. It can be worthwhile to pend a bit of time checking out the various terminal commands for git, so that you are more comfortable using it from the command line.
Resolving Diverging Branches
Section titled “Resolving Diverging Branches”This isn’t really an installation issue, but it is one that potentially relates to the git pull above. If you have local changes in your git history that aren’t in the remote AND you have changes in your remote that aren’t in your local repository, you may get the message “You have divergent branches …”. Here’s a quick way to resolve this (assuming you don’t have any merge conflicts):
git pull --rebase origin mainUpdating Your Tools
Section titled “Updating Your Tools”The programs you install to help you write code will often be updated over time. Some tools get updated frequently (VS Code is a good example, as new versions are published on a monthly basis). VS Code will open a pop-up when a new version is available. For all of the other programs, I recommend you to re-visit those download sites to see the prescribed process for updating.
Next Steps
Section titled “Next Steps”Another important part of software development is version control. Odds are, if you are using this site as part of your course, your instructor will want you to be using git as your version control system. They’ll also likely get you to use GitHub to host your code online. The next tutorial gives you a quick intro to the practice of version control.
Eager to jump right into JavaScript? You can skip the next tutorial and dive right into learning JavaScript with the QuickStart series.
Needing to explore terminal commands? Check out the reference guide.
QuickStart Series
Section titled “QuickStart Series”The QuickStart Series gets you up and running with JavaScript - No HTML or CSS required! There are four sets available.
You can start with the JavaScript Quickstart for beginners followed by the series About Objects and Functions. From there, you can jump into either JavaScript Projects or Flow Control Statements.
JavaScript QuickStart
Section titled “JavaScript QuickStart”Suitable for absolute beginners in JavaScript programming, these tutorials guide the user through the foundations of JavaScript and how to perform calculations and string manipulation.
About Objects and Functions
Section titled “About Objects and Functions”This series introduces Objects in JavaScript and explores the various ways we can create functions in JavaScript. It closes with a look at JavaScript modules as a way to organize larger code bases by splitting the code into several files.
Flow Control Statements
Section titled “Flow Control Statements”JavaScript Projects
Section titled “JavaScript Projects”As a result of following the first three sets of quickstart tutorials, you should have the following set of stand-alone JavaScript files.
DirectoryJS-Quickstart
- app.js Intro to JavaScript
- basic-math.js JavaScript Math
- controlling-text.js Manipulate Strings
- data-types.js Complex Data Types
- exploring-functions.js Functions
- functions-and-objects.js More Objects/Classes
- grok-decisions.js Conditionals
- handling-repetition.js Looping
- indexes-and-arrays.js Arrays
The last set - JavaScript Projects - moves you into the world of Node projects (again, focused on JavaScript apart from HTML/CSS).
DirectoryJust-JavaScript Node Projects
- package.json
- index.js
DirectoryKeeping-Organized JavaScript Modules
- package.json
- index.js
DirectoryLearning-With-Unit-Tests Unit Testing
- package.json
Directorysrc
- index.js
Directorytests/
- …
DirectoryJS-Quickstart Also JavaScript Modules
- modules.mjs
- node-support.mjs
- other-modules.mjs
DirectoryProjects Super-Simple CLI
- package.json
- index.js
DirectoryQueue-CLI Modern CLIs
- package.json
Directorysrc
- index.js
DirectoryRefactoring-Code
- package.json
Directorysrc
- index.js
DirectoryJS-Quickstart
- spread-operators.js
DirectoryTDD
- package.json
Directorysrc
- index.js
Directorytests
- test-first.spec.js
DirectoryUnit-Tests-Done-Right
- package.json
Directorysrc
- index.js
DirectoryVitest
- package.json
Directorysrc
- index.js
DirectoryWeb-Workers
- package.json
Directorysrc
- index.js
DirectoryxPlore-xTra/
- …
DirectoryYour-Future-Career/
- …
DirectoryZ/
- …