Adding <script> Tags to HTML
In the previous tutorial, we had our first look at writing JavaScript. In that exploration, we discovered that we can write ad-hoc JavaScript in the browser dev tools. We also made our first practical use of JavaScript: getting a reference to DOM elements.
In this tutorial, we will incorporate JavaScript directly into our web pages. You’ll discover two ways to achieve that: Embedding and Linking.
Tutorial Setup
Section titled “Tutorial Setup”Before we can explore JavaScript in this tutorial, we need an HTML page. We also need to get some feedback in our JavaScript code, so we will explore the console.log() function that is built into the browser.
-
Let’s create a bare-bones HTML page. Create an
index.htmlfile and paste in the following content.index.html <!DOCTYPE html><html lang="en"><head><title>HTML and JavaScript</title></head><body><h1>HTML and JavaScript</h1><p>We use the HTML <code><script></code> tag to include JavaScript in our web pages.There are two ways this tag can be used:</p><ul><li>Including JavaScript directly between the open and close <script> tag.</li><li>Referencing an external JavaScript file using the <code>src</code> attribute.</li></ul><p>View the source of this page in the browser dev tools and observe the output to the console.</p></body></html> -
View the page in the browser using the Live Server plugin.
- Author TODO: Add link to Reference page on using Live Server
-
In the developer tools console, type the following code:
document.querySelector('h1')Notice how the element is displayed in the console (just like the previous tutorial). While helpful, the downside is that we have to type the code to display the result - which is something that can’t be expected of the average visitor to our website.
-
Let’s try something else. We’ll use the
console.log()function (which is part of the browser environment) to display information to the dev tools console window.console.log(document.querySelector('h1'))Notice that we get the same result. The big benefit, however, is that we can use this JavaScript code inside our web page.
-
Before we finish the setup phase, let’s try another way to use
console.log.console.log('The heading element is:', document.querySelector('h1'))This time, we have a bit of descriptive text displayed just before our
<h1>element. We’ll remember that for the next sections in this tutorial.
In addition to setting up our lesson, we explored the basics of using console.log() to output information to the browser’s console window. The next part of this tutorial explores adding JavaScript directly into our web page by means of the <script> tag.
Embedding JavaScript in HTML Files
Section titled “Embedding JavaScript in HTML Files”When the browser renders an HTML file, it will automatically execute any JavaScript code it encounters that sits inside a <script> tag. For example, the following code would cause the text JavaScript is wonderful! to appear in the dev tools console.
<script> console.log('JavaScript is wonderful!');</script>This is an example of using embedded JavaScript in our web page. We refer to it as embedded because that actual JavaScript code is written directly inside the HTML file. Typically, we will use external scripts, which we’ll see in the final part of this tutorial. For now, let’s see what happens when we embed JavaScript directly inside our index.html.
-
Modify the
<head>to add in the following embedded JavaScript. Then view the page in the browser and open the dev tool’s console.<head><title>HTML and JavaScript</title><script>console.log('Inside the head tag');console.log('Here is the h1 element:', document.querySelector('h1'));</script></head> -
Make some observations. What did you expect to see? What did you actually see?
Here’s what you should see.
Inside the head tagHere is the h1 element: null -
Let’s try something different. Keep the script in the head tag, but modify the body by inserting a second script tag.
<h1>HTML and JavaScript</h1><script>console.log('Inside the body tag');console.log('Now I can see the h1 element:', document.querySelector('h1'));console.log('Can I see the first list item?', document.querySelector('li'));</script> -
Make some more observations. Are we able to see the
<h1>element from the script in the body? Here’s the output that should be generated in the console.Inside the head tagHere is the h1 element: nullInside the body tagNow I can see the h1 element: <h1>HTML and JavaScript</h1>Can I see the first list item? null -
It turns out that when the browser renders the HTML, it executes the embedded JavaScript at the point the script tag is encountered. If our JavaScript is trying to reference some DOM element that appears after that script element, then the
document.querySelector()returns anullresponse. This is because that DOM element hasn’t been created yet!
As you can see, we are not constrained to having just one line of JavaScript inside the <script> tag. We can write as much as we want. In fact, we even included multiple <script> tags, each with their own code! For practical purposes, however, we typically want to keep our HTML and JavaScript somewhat separate, as we will explore in this next part.
Linking External JavaScript files
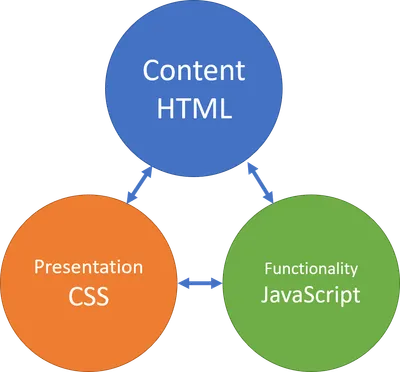
Section titled “Linking External JavaScript files”Just like <style> tags can include CSS inside an HTML file, the <script> tag can be used to embed JavaScript right inside our HTML markup. But, as you have probably been taught about CSS, it’s also better to keep our JavaScript code in separate files. JavaScript files have the file extension .js. Like HTML and CSS, they are simply text files that can be edited through any text editor.
We still use the <script> tag to link external JavaScript files, but we do so by adding in a src attribute. Let’s see what happens!
-
Reset your
index.htmlby removing the scripts created in the last part. If you want to keep that previous version, you can save it as a copy (e.g.:index-old.html). -
Create a new file to hold the JavaScript code.
js/main.js console.log('JavaScript in a separate file (main.js)');console.log('Looking for the h1 element:', document.querySelector('h1'));console.log('Can I see the first list item?', document.querySelector('li')); -
Now, link to the JavaScript file by adding a script tag with the
srcelement, as follows.<head><title>HTML and JavaScript</title><script src="./js/main.js"></script></head> -
What happens when you look inside the browser’s console? Do you see the following?
JavaScript in a separate file (main.js)Looking for the h1 element: nullCan I see the first list item? null -
Just like embedded scripts, the browser will immediately execute the JavaScript in an external file. Is there a way to fix this? YES! Alter the script tag by adding a
deferattribute.<head><title>HTML and JavaScript</title><script src="./js/main.js" defer></script></head> -
Now you should see the desired results. Our JavaScript can find the DOM elements!
JavaScript in a separate file (main.js)Looking for the h1 element: <h1>HTML and JavaScript</h1>Can I see the first list item? <li>::marker" Including JavaScript directly between the open and close <script> tag. "</li> -
The
deferattribute told the browser to delay running the JavaScript until the DOM was loaded and constructed. That’s great for stand-alone script files, but we’ll soon discover the usefulness of JavaScript modules. Change the script tag once more and swap out thedeferattribute withtype="module".<head><title>HTML and JavaScript</title><script src="./js/main.js" defer></script><script src="./js/main.js" type="module"></script></head> -
Once again, we see the desired results. While it might not look like much has changed, our
main.jsJavaScript file will now be able to useimportstatements to get ahold of other script files on it’s own. meaning we would only need a single<script>tag in our HTML file.Trust me, you’re going to want to use the
type="module"attribute almost all the time!
Conclusion
Section titled “Conclusion”You have incorporated JavaScript into your first HTML page. Along the way, you’ve probably picked up a few ideas about how browsers build the Document Object Model when it loads the HTML file. Among the things to note is the importance of keeping HTML, CSS, and JavaScript code in separate files! This is considered a best practice. There are several benefits to doing this, but one of the biggest is that using separate files reduces the maintenance cost of your code.
At this point, I would conclude with a couple of Key Reminders when using <script> tags.
- Prefer keeping your JavaScript code in external
.jsfiles rather than embedding it directly in your HTML. - It’s common practice to put the
<script>tag in the<head>portion of our markup. - Use the
type="module"or thedeferattribute to ensure that the entire<body>is loaded into the DOM before executing any of the JavaScript code. - Each
<script>can link to only one external file using itssrcattribute. - Though rarely needed, you can add more
<script>tags to run separate JavaScript files; simply add them with theirsrcattributes linking to the desired files.
There are other things to consider when our JavaScript files get bigger, and we’ll address those when we cover JavaScript Modules in an upcoming tutorial. For the moment, our JavaScript files will be short enough to only need one, and we can just use the defer attribute.