Intro to Event Listeners
In this tutorial, we’ll explore listening to events on our web pages. Events can come from several places. For example, events can come from the user in terms of mouse and keyboard events. We’ll look specifically at mouse click events that happen on specific parts of our web page.
A preview of the before and after versions of the website is available for you to explore the behaviour.
Preview
Notice how the sample includes clickable items. One of those is a normal hyperlink that goes to the MDN page on event listeners (though, in this preview, MDN is refusing to deliver content, because this preview uses an <iframe>).
Some things to note include:
- The button and hyperlink are nested inside the H1 tag.
- Nothing happens yet, even though the JavaScript file is linked in the page.
Let’s begin with a starter kit to explore creating event handlers. Take a moment to set up all the files and folders. When the page is set up, it should look like this.
Use this file/folder structure when applying the starter code.
Directoryjs
- main.js
- favicon.webp
- index.html
<!DOCTYPE html><html lang="en"><head> <meta charset="UTF-8"> <meta name="viewport" content="width=device-width, initial-scale=1.0"> <title>Soft Intro to Events</title> <link rel="shortcut icon" href="favicon.webp" type="image/x-icon"> <link rel='stylesheet' href='https://cdn.jsdelivr.net/npm/@picocss/pico@2/css/pico.min.css'> <style> #register { padding: 6px 4px } h1 small { font-size: small; font-style: italic; } </style> <script defer src="./js/main.js"></script></head><body class="container"> <h1> Click Me <button id="register" type="button">or dbl-click me</button> <small> <a href="https://developer.mozilla.org/en-US/docs/Learn_web_development/Core/Scripting/Events">Events on MDN</a> </small> </h1> <pre><output id="feedback"><i>Output will appear here...</i></output></pre></body></html>console.log('JavaScript file loaded!');let feedback = document.getElementById('feedback');
const handleClick = function(event) {    // TODO: Use for exploration purposes    const target = event.target;    feedback.innerText = `Clicked from ${target.tagName}`;}
let heading = document.querySelector('h1');heading.addEventListener('click', handleClick);
// TODO: Complete the rest of the tutorialRight-click this image and save it as favicon.webp.
A Primer on Events
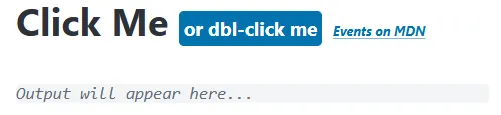
Section titled “A Primer on Events”This starter kit already contains working code that responds to user events. The <h1> element has been wired up to a method that will output a message on the page in response to mouse clicks on that element. Take special note that inside the <h1>, I have placed a button and a hyperlink.
<h1> Click Me <button id="register" type="button">or dbl-click me</button> <small> <a href="https://developer.mozilla.org/en-US/docs/Learn_web_development/Core/Scripting/Events">Events on MDN</a> </small></h1>Give it a try. What happens when you click on the text “Click me”? You should see a message that says Clicked from H1. If you click on the button, the message changes slightly. If you click on the hyperlink … the browser navigates to a page on the Mozilla Developer Network.
How does this work?
User actions are processed by the browser as “events” that take place with respect to some part of the web page (DOM). The browser tracks what happens, where it happens on the page, and a whole host of other aspects surrounding the event. We can write code to respond to those events. But we have to tell the browser:
- Which DOM element and event we want to listen to, and
- What we want to do in reponse.
The basic structure of our JavaScript code will look like the following.
// Generic event listening patternsomeElement.addEventListener(eventName, handlerFunction);Every DOM element has an .addEventListener() function that accepts two parameters: A string to identify the name of the event (eventName) and a function for the browser to call when the event has occurred (handlerFunction).
Writing Event Handlers
Section titled “Writing Event Handlers”Our starting point includes an event handler function and the code that registers our handler.
const handleClick = function(event) { // TODO: Use for exploration purposes const target = event.target; feedback.innerText = `Clicked from ${target.tagName}`;}
let heading = document.querySelector('h1');heading.addEventListener('click', handleClick);The handleClick() function will find out what DOM element received the event (event.target) and will then display a message using the .tagName of that element.
Let’s dive into the main.js file to begin telling the browser what to do when the user clicks on things.
-
As you’ve discovered, clicking on the hyperlink causes a page navigation. That’s the default behaviour for
<a>elements. ModifyhandleClickto prevent the default action.main.js const handleClick = function(event) {// TODO: Use for exploration purposesevent.preventDefault();const target = event.target;feedback.innerText = `Clicked from ${target.tagName}`;}Now when you click on the hyperlink, the browser no longer loads the linked page and the message
Clicked from Aappears on the page. -
Let’s create another event listener. This time, we’ll do something special when the user double-clicks on the
<button>. But we’ll write the code in a slightly different way.main.js // Put this below the last TODO commentlet button = document.getElementById('register');button.addEventListener('dblclick', function(evt) {let name = prompt('What is your name?');let email = prompt('What is your email address?');feedback.innerText = `Glad to meet you ${name}! I've sent an invitation to join our JavaScript club. It was sent to you at ${email}.`;});Notice that the second argument for the
.addEventListener()is a function declaration. In fact, it’s what we would call an inline function declaration. It also happens to be an anonymous function because it doesn’t have a name associated with it.You can read more about this in [Author TODO][link-to-article]. For now, just note that the complete function declaration is being passed into
.addEventListener()as the second argument. -
View the results in the web page. When you double-click the button, you should be presented with two prompts. Then the message should appear on the page.
-
Let’s add another event listener to our
headingelement. Once again, we’ll use thedblclickevent, and we’ll simply show the user analert()dialog.main.js heading.addEventListener('dblclick', function() {alert('Try double-clicking on the button instead of this heading.');});Double-click on the
Click Metext. The browser should present you with an alert dialog. -
Now try double-clicking on the button. Once again, you will be presented with the two prompts. But something else happens: The
alert()from our heading appears!The reason that both event handlers get called is because the double-click event propagated up the DOM tree. Remember how the
<button>is a child of the<h1>? The event was captured by the button’s listener, but then the event “message” was sent to the parent element. In fact, it “bubbled” up the entire DOM tree until it reached the root<html>element, looking for event handlers all along the way! -
To stop the event from bubbling up the DOM tree, make the following changes to our earlier button event.
main.js // Put this below the last TODO commentlet button = document.getElementById('register');button.addEventListener('dblclick', function(evt) {evt.stopPropagation();let name = prompt('What is your name?');let email = prompt('What is your email address?');feedback.innerText = `Glad to meet you ${name}! I've sent an invitation to join our JavaScript club. It was sent to you at ${email}.`;}); -
Test the button again by double-clicking on it. Does it solve the problem of event bubbling? It should!
Conclusion
Section titled “Conclusion”Author TODO: finish this with some useful summary…