Interactive DOM Elements
In this tutorial, we’ll apply stylistic changes to our web page in response to the user’s interaction with the site. The following animated image illustrates what we aim to achieve.
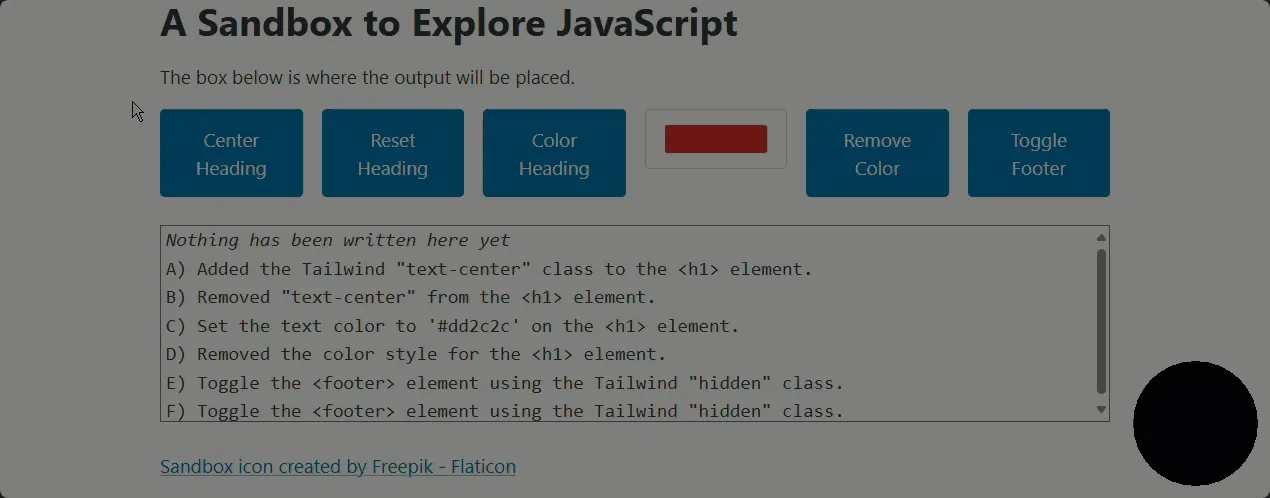
Customizing the Sandbox
Section titled “Customizing the Sandbox”Our starting point will be a customized version of the Sandbox, one that has several buttons for triggering each of the DOM stylings.
-
Grab a copy of the Sandbox starter kit files.
-
Replace the
main.jscode with the following. This includes theappendLine()and supporting functions from a previous tutorial.console.log('main.js has been loaded');let step = 0; // A global variable to track our current stepconst appendLine = function(someText) {let letter = `${offsetStepA(step++)}) `;const sandbox = document.querySelector('output#sandbox');sandbox.innerHTML += '<br>';sandbox.innerHTML += letter + someText;}const offsetStepA = function(offset) {let step = 'A';let characterCode = step.charCodeAt(0);characterCode += offset;let text = String.fromCharCode(characterCode);return text;}// TODO: Use the space below for playing with JavaScript. -
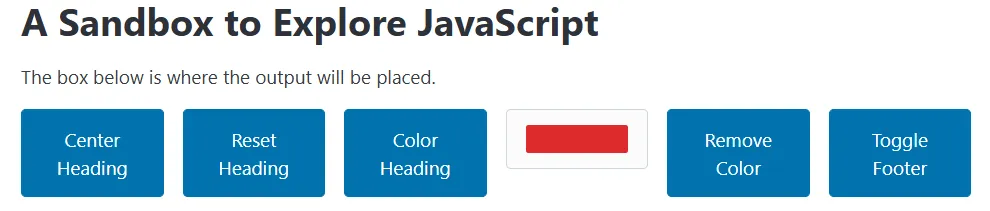
Add the following markup to the
index.html, just between the<p>...</p>and<output>...</output>. We will use these buttons and the color input control to dynamically apply stylistic changes to the page.<div class="grid"><button id="btnCenter" type="button">Center Heading</button><button id="btnReset" type="button">Reset Heading</button><button id="btnColor" type="button">Color Heading</button><input id="pickedColor" type="color" value="#dd2c2c" /><button id="btnRemove" type="button">Remove Color</button><button id="btnShowHide" type="button">Toggle Footer</button></div>
Styling Through JavaScript
Section titled “Styling Through JavaScript”We’ll use each of the buttons on the page to perform slightly different style changes to the page. Note that the changes to our DOM elements will only take one or two lines of code to achieve. Our event handlers will also include a call to appendLine() to document the change that has been applied.
-
Here we will add event listeners to apply style changes to our page. Most of the buttons are affecting the
<h1>element, so our first line of code will be to create a global (shared) variable to reference that element.const pageHeading = document.querySelector('h1'); -
Let’s add the event for the button to center the
<h1>text on the page. We’ll achieve the centering by adding a CSS class to that element. This classname comes from the TailwindCSS styles.document.getElementById('btnCenter').addEventListener('click', function() {pageHeading.classList.add('text-center');appendLine('Added the Tailwind "text-center" class to the <h1> element.');}); -
Now let’s remove the
text-centerCSS class from the<h1>element.document.getElementById('btnReset').addEventListener('click', function() {pageHeading.classList.remove('text-center');appendLine('Removed "text-center" from the <h1> element.');}); -
Other than applying CSS classes, we can change the appearance of DOM elements through the
styleattribute. Programmatically, we do this through the.styleproperty of the DOM element. The following code will use the value from the<input type="color">control and apply it to the.style.colorof the<h1>element.document.getElementById('btnColor').addEventListener('click', function() {let input = document.querySelector('input[type=color]');pageHeading.style.color = input.value;appendLine(`Set the text color to '${input.value}' on the <h1> element.`);}); -
Just as we can remove CSS classes, we can remove individually applied styles on our DOM elements. The difference, however, is that we do so by setting the style value to an empty string, as shown in this next button.
document.getElementById('btnRemove').addEventListener('click', function() {pageHeading.style.color = '';appendLine('Removed the color style for the <h1> element.')}); -
Lastly, let’s toggle the
<footer>on the page through Tailwind’shiddenclass. The.classList.toggle()method will alternate through adding or removing the supplied class name based on whether it’s currently in the list of CSS classes on the element.document.getElementById('btnShowHide').addEventListener('click', function() {let foot = document.querySelector('footer');foot.classList.toggle('hidden');appendLine('Toggle the <footer> element using the Tailwind "hidden" class.')});
Conclusion
Section titled “Conclusion”We’ve only touched the surface of the ways we can manipulate the appearance of our DOM elements. The three methods of the .classList property allow us to add, remove, or toggle CSS classnames on our elements. Any of the hundreds of the possible style attributes can be individually set through the members of the DOM element’s .style property.
All of our interactions were triggered through button clicks. We could have used any type of event to initiate those DOM changes: mouse movements, keyboard activity, page scrolling, etc. Take some time to imagine what effects you might want to programmatically achieve when the user interacts with the page.