Practice Version Control
If you are writing source code (HTML, CSS, JavaScript, C#, etc.), then you should be using a version control system.
Version control systems help you by providing a history of your source code changes. It goes a lot deeper than that, and its benefits get more profound as your skills with it improve. Nevertheless, version control is a necessity in today’s job market. The most popular version control system today is git, and the most popular place to host your git repositories online is GitHub.
In this tutorial, we will create a git repository to hold the source code for a simple website. We will also push it up to GitHub using the GitHub CLI.
Setting Up Your Repository Folder
Section titled “Setting Up Your Repository Folder”-
We will start with an empty folder. Create a new folder somewhere on your computer (e.g.: under
C:\GH\Sandbox) and name the folderMy-First-Repo. -
Launch Visual Studio Code and select
Open Folder...from theFilemenu (or press Ctrl+k Ctrl+o). -
Create a new file by pressing Ctrl+n. Then paste in the following code.
# Folder to ignore for Node-based projectsnode_modules# Folder for my local computer only (Dan's personal favorites)[Nn]o[Ttrack][Rr]n[Dd] -
Save the file (Ctrl+s) and name it
.gitignore(note the leading dot in the filename). -
Create another new file named
.gitattributes, and paste in the following code.# Set default behavior to automatically normalize line endings.* text=auto# Force batch scripts to always use CRLF line endings so that if a repo is accessed# in Windows via a file share from Linux, the scripts will work.*.{cmd,[cC][mM][dD]} text eol=crlf*.{bat,[bB][aA][tT]} text eol=crlf*.{ics,[iI][cC][sS]} text eol=crlf# Force bash scripts to always use LF line endings so that if a repo is accessed# in Unix via a file share from Windows, the scripts will work.*.sh text eol=lf -
Create one more file named
ReadMe.mdand enter the following code.# My First RepoI am following Dan's [Practice Version Control](https://dgilleland.github.io/CPSC-1520/tutorials/0011/) tutorial for my website's source code. -
What you should see is a folder with three core files that every repository should have.
DirectoryMy-First-Repo
- .gitignore
- .gitattributes
- ReadMe.md
We’ve created a folder for our source control. Now it’s time to add version control.
Set Up Version Control
Section titled “Set Up Version Control”The git version control system works by treating a folder as a repository of your source code. To set up version control, you need to initialize the folder (a one-time step) and then make regular and frequent commits of changes to your source code. We’ll do all these steps from within Visual Studio Code’s built-in terminal environment.
-
Open the terminal in VS Code (Ctrl+`).
-
Type
git initto initialize the folder as a git repository. -
Stage (prepare) your current files for entry into the version control history.
Terminal window git add . -
Commit (save) the staged files as a permanent “snapshot” of the current state of your source code.
Terminal window git commit -m "My first commit" -
Follow steps 3 & 4 whenever your changes are ready to be added to the git history.
How often should you do a git add . and git commit -m "Message"? Whenever you make a set of changes that represents a stable update to your source code. The key, however, is to not put off doing commits. Small and frequent commits is the secret sauce to good version control.
One last note. You should put some thought into the messages you use for your commits. If you make them meaningful, then they will help “future you” down the road. Don’t fall into the trap of sloppy commit messages!

Add the Repo to Your GitHub account
Section titled “Add the Repo to Your GitHub account”Right now, your code repository exists only on your computer. Most of the time, we want to have a copy of it “in the cloud” (if only as a backup should the worst happen to your computer). In this part, we will use the GitHub CLI to take our code and clone it onto GitHub.
-
In the terminal, type the following.
Terminal window gh repo create -
Using the arrow keys on your keyboard, select the option “Push an existing local repository to GitHub”.
-
Press Enter to accept the default path of your current repository (
.). -
Press Enter to use the current name of your repository folder (
My-First-Repo) as the repository name on GitHub. -
Select your personal Github user account as the “Repository Owner”.
-
Press Enter for all the remaining prompts to accept the defaults.
When you are done, your local repository will be cloned onto GitHub. To open the GitHub repo from VS Code, type gh browse in the terminal.
Adding Source Code
Section titled “Adding Source Code”-
We’re going to use the following folder structure for our new files.
DirectoryMy-First-Repo
Directorysrc
- index.html Our Web Page
Directorycss
- styles.css Some simple styles
Directoryimg
- professor.svg Because having pictures is cool
Directoryjs
- main.js This site is all about JavaScript, you know…
- .gitignore
- .gitattributes
- ReadMe.md
-
Create the
index.htmlfile and use the following code.index.html <!DOCTYPE html><html lang="en"><head><meta charset="UTF-8"><meta name="viewport" content="width=device-width, initial-scale=1.0"><title>My Simple Website</title><link rel="stylesheet"href="./css/styles.css"></head><body><h1>Welcome</h1><img src="./img/professor.svg" alt="My Instructor"><p>I am practicing the use of Version Control as I learn JavaScript. Join me on the journey!</p></body></html> -
Create a simple
styles.csswith the following code.styles.css img {float: right;width: 250px;padding-left: 50px;} -
Add the following image by right-clicking it and saving the image to your computer. Make sure to name it
professor.svg.
-
Lastly, commit and push the changes.
Terminal window git add .git commit -m "First pass on my website content"git pushNotice how I’ve added the
git pushcommand. This will make sure to push your local git history to GitHub.
More Source Code
Section titled “More Source Code”Let’s throw in just a bit more to improve the look of our site. Specifically, we want to add a 3rd-party CSS file and a touch of JavaScript.
-
Modify your
index.htmlfile to include the following highlighted changes.index.html <!DOCTYPE html><html lang="en"><head><meta charset="UTF-8"><meta name="viewport" content="width=device-width, initial-scale=1.0"><title>My Simple Website</title><link rel="stylesheet"href="https://cdn.jsdelivr.net/npm/@picocss/pico@2/css/pico.min.css"></head><body class="container"><h1>Welcome</h1><img src="./img/professor.svg" alt="My Instructor"><p>I am practicing the use of Version Control as I learn JavaScript. Join me on the journey!</p></body></html> -
This has applied the third-party library PicoCSS. Let’s commit our work.
Terminal window git add .git commit -m "Added PicoCSS stylesheet" -
Now, let’s throw in a touch of JavaScript. Create the
main.jsfile with the following content.main.js let today = new Date();let copyrightMessage = `<footer>© ${today.getFullYear()}</footer>`;document.body.innerHTML += copyrightMessage;Don’t worry if you are unsure of what the code does - we’ll look at understanding JavaScript in later tutorials. This sample is just to complete our sample of typical file types used in websites:
*.html,*.css,*.js, and images. -
To get our JavaScript to run in our website, we need to link to it with a
<script>tag. Modify the<head>of the page to match the following.index.html <head><meta charset="UTF-8"><meta name="viewport" content="width=device-width, initial-scale=1.0"><title>My Simple Website</title><link rel="stylesheet"href="https://cdn.jsdelivr.net/npm/@picocss/pico@2/css/pico.min.css"><script src="./js/main.js" type="module"></script></head> -
Now when we view our page, a footer is added dynamically with a copyright for the current year. Let’s commit our work.
Terminal window git add .git commit -m "Add copyright year via JavaScript"git push
Conclusion
Section titled “Conclusion”In this tutorial, we created a local repository using Visual Studio Code and git. We added files, committed changes, and pushed/synchronized our work with GitHub. This whole cycle of a) write code, b) commit changes, and c) repeat is what makes up the bulk of our creative work as software developers.
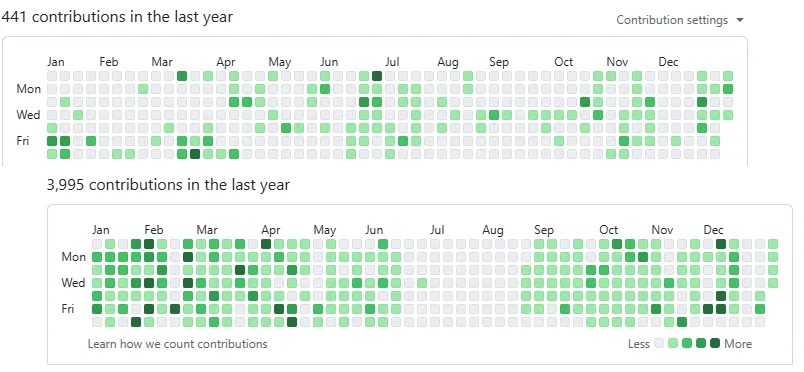
Build a RoutineAs you continue to expand your knowledge and develop your skills, you have the opportunity to get better and better with version control. I find myself using git several times a day. From the public repositories of my work and personal GitHub accounts, I’ve done well over 4,000 commits in 2024 alone. Just remember the secret sauce: Small and Frequent commits.